Are u hungry?

Sunday, 26 October 2008

Modern Apizza - Coal Fired Pizza in New Haven, Connecticut


We just got back from Modern Apizza in New Haven, Connecticut. Modern is the third member of the Holy Trinity of Pizza. The first two are Pepe's and Sally's. If you go to Pepe's or Sally's, you can expect to wait in line.

The most amazing thing about Modern Apizza, is that we were able to get right in without waiting in line.

No waiting. No line. No nothing. The pizza's were delivered to our table with-in ten minutes after we sat down. Talk about service!

We ordered three pizzas: a Clam Pizza, an Italian Bomb and a Cheese, Peppers and Onions.

Incredible! The pizza was different from Pepe's and Sally's Apizza but certainly right up there in quality. The pizza was some of the thinest crust I have ever tasted. This was true Neapolitan pizza.

The clam pizza was served with lemons and had a creamy cheesy taste. All of the pizzas had a generous amount of toppings. There was no skimping in that department.

It almost seems to me that Modern Apizza may be the absolute best kept secret in New Haven. There was ample parking as well.

Now because the pizzas are cooked in a brick oven, you need to expect a certain amount of blackness around the crust.

According to The Modern Menu: the heat in the brick oven will reach temperatures in excess of 700 degrees. The menu goes on to explain that pizzas may be a little black around the edges and even lose their perfect shape due to contact with the brick floor of the oven. That is the price you pay for pizza perfection.

Modern Apizza deserves to be recognized as having one of the absolute best pizzas in the world! None of us had ever been to Modern before, and you can bet your clams, we will return.

Modern Apizza is located on 874 State Street in New Haven, Connecticut.

Japanese Shabu Shabu in Chicago - For Those Seeking a Unique and Deluxe Dining Experience


If you have ever wondered what shabu shabu is, look no further. Allow me to introduce you to a world of freshness and quality as we dive headfirst into all things shabu shabu.

To be brutally honest, the food known throughout the world as shabu shabu is not really Japanese. Shabu Shabu originated in Mongolia, and most culinary experts would agree that Genghis Kahn developed this dish to efficiently feed his soldiers in the 13th century. Yes, that Genghis Kahn, the man who almost conquered the whole world. Despite the origins of this delicious food being Mongolian, many regard the food as Japanese because they introduced it to the world.

If you don't know what shabu shabu is, it is basically razor thin slices of premium beef and assorted vegetables cooked in a hot pot. This hot pot is embedded in the dining table (each customer gets their own hot pot directly in front of them) and the customer puts the food into the pot (to cook) at his or her convenience. There are other varieties of shabu shabu that substitute seafood (crab, shrimp, clams, mussels, squid and scallops) for the beef. Also, if you are a vegetarian, you can enjoy just the assorted vegetables in the hot kelp broth. Among the choices for the cooking broth that goes into your hot pot include: chicken and kelp. After eating your meat and vegetables, you have the convenient luxury of having a delicious broth to either cook noodles or risotto in. Shabu Shabu is the ultimate social food because you cook the food at your own pace and you can spend an hour or so engaging in conversation while the food is always fresh and hot because you cook it whenever you want. No stale and cold food here! It truly is the ultimate food for engaging in long conversations while maintaining the essence that is fresh food.

If you end up in shabu shabu rehab, don't blame me, I warned you. This food is my favorite culinary treat. Specifically, the sauces that go with the freshly cooked beef are so amazing. You really have to try it to understand my madness for shabu shabu. I love all foods, but shabu shabu is something I crave at work and in my sleep because of: the savory taste, the unbeatable value and the incredible health benefits. In my most humble opinion, the most perfect foods in the world are the ones that can offer incredible taste while providing a healthy dining experience.

Vintage Recipes For Chinese Style Entrees


Chinese-style meals are not only tasty, they are usually quick, easy, inexpensive and healthy. In my vintage recipe collection I have two great recipes to share.

Chicken and Vegetables Chinese is definitely a recipe that has the above mentioned attributes. It is easy to make, doesn't take much time, the ingredients aren't expensive, and it makes six servings of only 200 calories each. That's a pretty good deal!

CHICKEN AND VEGETABLES CHINESE

1 lb boneless, skinned chicken breast cut into 1 1/2" pieces
2 cans chicken broth or 4 to 5 chicken bouillon cubes dissolved in 3 cups boiling water
1/2 cup raw rice
2 tbsp soy sauce
1/4 tsp ground ginger
2 cups sliced carrots
1 cup sliced green onions
1 small can Chinese vegetables, drained
1/2 cup cooking sherry
1 clove minced garlic
1/4 tsp sage
1/2 cup sliced celery
1/2 cup sliced green pepper (bell pepper)
6-oz pkg frozen pea pods or peas

Brown chicken in a large Pam sprayed pan. Add broth, rice, sherry, soy sauce, garlic and ginger. Simmer, covered, 15 minutes. Add remaining ingredients and simmer until tender. Makes 6 servings of about 200 calories each.

Sweet and Sour Pork slow cooks for one hour but otherwise is a quick recipe. Again, it is not expensive, it is easy and again, it is a healthy meal.

SWEET AND SOUR PORK

1 lb pork tenderloin, cut into strips
oil for browning
1/3 cup water
1 1/2 tbsp cornstarch
1/3 cup brown sugar
1/3 cup vinegar
3/4 cup pineapple juice
2 tsp soy sauce
1 cup sliced mushrooms
2 cups pineapple chunks
1 green pepper, cut in strips

Brown pork in oil. Add water and cook slowly for 1 hour. Add cornstarch, brown sugar, vinegar, pineapple juice, and soy sauce; mix well. Simmer 15 minutes. Add remaining ingredients and simmer 5 minutes. Serve over rice.

Enjoy!

Fish - The Healthy and Nutritious Way


I was watching the channel "Discovery Travel and Living" the other day. Food related shows are definitely one that catches my attention. They are a great source of information about food in particular and of course not to mention the numerous wonderful recipes. Last evening was what I call a "foodie evening" on the channel. This is one reason that I love Thursdays. There is nice program titled "Floyd's India" followed by "Indian Cooking made easy" with Anjum Anand hosting it.

In Floyd's India, he chooses a destination each time and is acquainting his audience with the cuisine of the particular place. He actually does cook some of the traditional or popular recipes. The first episode was on Rajasthan, a state in India. This week however, he decided to put up his tent at the popular tourist destination - Goa. A wonderful episode for seafood lovers. He cooked fish, crab and even mussels.

A sweet coincidence or must I say a "fishy coincidence" that Anjum Anand too decided to have "fish" as her theme for the evening. She cooked delicious lime rice and served it with traditional Indian fish curry from the state of Maharashtra (fish cooked in coconut milk and coriander). Couldn't resist it and so it's fish for lunch today and also my theme for the day.

Fishes offer so much variety. Each fish has it own distinct taste adding that little extra to your dish. So very easy to cook, a little marination and the right ingredients that make it one of the best dishes that you have ever cooked or had. The popularity of fish and chips, I guess does say it all.

A high nutritional value, low in fat and being a rich source of omega 3 fatty acids makes fish a popular choice for a healthy menu. Fish is good for your heart.

It is definitely an important part of several cuisines whether Chinese, Thai, American, French or Indian. The style of cooking may differ from one cuisine to the other however, the final result of a tasty dish is the same whichever style of cooking or school of thought you decide to follow. Fish is wholesome food served with just a salad and a slice of bread. Easy , quick and indeed delicious that's how it is.

Not many however, may be well-versed with buying and cooking fish. Here are a few tips while handling fish:

-The smell and the looks of the fish are major indicators which would help you make the right decision while buying fish.

-It should smell fresh. It must definitely not have a stale smell. If that is so, then it sure is a no...no.

-It must look appealing. Must look fresh and the skin must be firm. When you touch the skin it must be tight and not leave a depression on the surface. There must be no discoloration.

-The eyes must be bright and red on the underneath.

-Fish cook really fast and so do ensure that you do not end up overcooking it.

With a variety of ways to cook it, there sure is lot of scope for experimenting. Each one to his own taste...that's the way it is.


What's For Dinner? 30-Minute Menus For Week of Oct 19

How would you like to put dinner on your table in 30-minutes flat? You can with these menus!

Are you making plans for a Spooky Halloween or a Fall Festival? I am - this is going to be a very busy week getting ready for a Halloween Party for my Sunday school class so I have included quick and simple 30-minute menus this week. You can use your precious time getting for fun Fall events using these menus!

We are having company Saturday night so I have planned an elegant meal. I will add appetizers of prochuttio wrapped bread sticks, a wedge of cheese (brie or similar) with assorted crackers, and salsa with veggies for a tasty beginning to our meal. The bread sticks, salsa, and bagged pre-cut veggies will be purchased making it very easy on the hostess! I will even have time for a glass of wine before the company arrives and will be relaxed and ready (now this is my kind of entertaining!).

I hope you have a great week!

Sunday: Eye of the Round Roast Beef with Peppercorn Sauce (crock pot, save some beef for Wednesday), Mashed Potatoes, Chop House Salad, Individual Boston Cream Tortes (pound cake with instant pudding mix)

Monday: Bistro Chicken (chicken tenders, canned tomatoes), Linguini, Green Beans, Caramelized Peaches and Cream (purchased whipped cream)

Tuesday: Thai Shrimp (packaged mix, cleaned and deveined shrimp), Angel Hair Pasta, Cuke and Honeydew Salad, Strawberry Shortcakes (purchased sponge cake shells and whipped cream)

Wednesday: Blue Cheese Crusted Beef Stew (beef from Sunday, blue cheese folded into purchased pie crust for topper), Fruit Salad, Apple Dumplings (purchased pie crust wrapped around cored and filled apples)

Thursday: Turkey Tetrazzini (precooked turkey or chicken - I will use canned chicken), Broccoli Vegetable Medley, Ice Cream with Pecan Shortbread Cookies (purchased ice cream and cookies)

Friday: Fresh Tomato and Double Cheese Tart (puff pastry), French Green Beans, Pineapple Salad, Embellished Chocolate Cookies (purchased cookie dough)

Saturday: Grilled Salmon with Dill Butter, Long Grain and Wild Rice (boxed), Snow Peas, Tossed Salad (bagged salad), Lemon Affogato (purchased lemoncello liqueur)

I sincerely hope you have fun with your meal planning and preparation,

Elizabeth Randall and Family

MomsMealConnection is designed to help busy moms everywhere prepare meals - family meals, holiday celebrations, and special dinners plus entertaining - through recipe and meal planning links. Most of the links are fast, fun, and free to use. Who has time to waste searching endlessly through the web? Certainly not us moms!

I have started a new feature on my web page, http://www.MomsMealConnection.com - I am creating Complete Menu Plans using my 30-minute menus: The Complete Menu Plans give you recipes and step-by-step instructions for preparing the complete meal (not just the entree as most meal plans do) in 30 minutes - flat!

I even include a grocery list to save unnecessary trips to the grocery store.

These are eComplete Menu Plans so you can order the menu plan now and use it for dinner tonight!

You won't have to spend your precious time thinking of menu ideas and then looking up the recipes - I will send it all directly to you!

If you have found my 30-minute menus helpful, then you must check out the 30-Minute Complete Menu Plans!

Shrimp and Grits - Simple Food, Not Fast Food


When you hear the words shrimp and grits, you naturally think of the Southern states that border the Gulf of Mexico: Alabama, Mississippi, and Louisiana. This is not a dish prepared often in Florida or Texas, since these states have developed different cuisines of their own. Texas is the oil and beef region, while Florida is a bit of heaven for senior citizens and college kids.

Shrimp and grits is a simple dish. You cook the grits and you cook the shrimp and just before serving, mix them together, right? Well, sort of. Grits are a versatile food. They can easily be turned into a base for sweet or savory or spicy dishes, or even eaten on their own like porridge.

When cooking shrimp and grits, it's a good idea to cook the grits based on your plans with the shrimp. Say you were in the mood for a spicy dish. You decide to cook garlic shrimp, using fresh garlic along with some finely diced peppers and onions. Since the grits won't cook as quickly as the shrimp and vegetables, you'll want to be sure to get them started first.

Now, we could set the grits boiling in plain water, but where would the flavor be in that? Better to use a low-sodium chicken or vegetable broth mixed with a broth made by boiling the shells of the peeled shrimp in a pan of water for a few minutes. Once the grits are simmering (remember to stir occasionally), you can start on cooking the shrimp.

Put cut up onions and peppers together with the dried spices into a fairly hot frying pan with a good deal of butter and saute till softened, remembering to stir frequently. When the onions are halfway cooked, slide the garlic in. After cooking, put the mixture to one side. When the grits are ready, blend in a bit of cream, turn up the heat under the shrimp pot, and add a bit of lemon rind along with the shrimp. The shrimp should be cooked till they're pink. Take them off the burner, throw in a little chopped parsley, and pour in the lemon juice. When serving, the shrimp should be placed on top of a mound of grits.

I know it's a cliche, but salt and pepper and spice to taste. Good herbs and spices for this dish include ginger, cayenne, dill, and parsley. Don't be afraid to experiment, but remember that shrimp & grits are simple flavors that, though they mix well with a lot of things, are easily overwhelmed by too many strong flavors in the dish.

Cooking Stew


The kitchen is your work room; it can be a place of stress or a place of release. However, whatever your kitchen is to you, it is a great place to make a stew for the whole family. Perhaps this sounds a little daunting, after all, stews are a serious cooking project, however, the result can calm any mood and make a would-be-boring dinner, into an extravaganza worth remembering.

I have three favorite stew recipes to recommend to you; the Chuckwagon Stew Recipe, Montana Cowboy Stew Recipe, and Amish Beef Stew Recipe.

Chuckwagon Stew

Chuckwagon stew is an old-time favorite for stew makers, because it is a recipe stew that almost everyone is familiar with and one which everyone likes. You need a pound and a half of beef, half a pound of sliced sausage, a white onion, four potatoes, and a can of baked beans. This dish takes about eight to ten hours to stew in a slow cooker, gradually spooning the bean s in every hour or so. This will serve six people, each serving having about 600 calories.

Montana Cowboy Stew

For this stew you need more potatoes, about 8, an onion, green beans, 3 cans of cream of chicken soup (any brand). Coat the beef with flour, salt, pepper, and garlic powder, to help add flavor to the beef. Put the beef in a plastic bag with all those ingredients, shake until fully covered. Fry the meat while slowly roasting the potatoes and onions. Combine these two together when fully cooked, and add the soup over everything. This stew cooks much fast in four hours, and serves ten people.

Amish Beef Stew

Amish Beef stew is much more vegetable based, if you have would like a little healthier stew. There is no sausage in this stew, just beef, combined with flour, onions, potatoes, carrots, celery, and a cup of tomato juice. Because this has less meat, the tomatoes help create a more marinated, thicker consistency to the stew.

Stew is on of those American classics that can serve a large group of people, or can keep for a week of leftovers for the family.

Tips For Picking Steaks


As a third generation butcher at B&B Grocery, Meat & Deli, I'm often asked how to pick out a perfect steak. Here's what I tell my customers.

Don't just pick out any steak. That is one of the worst things you can do. All steaks are not the same. Therefore, take your time when picking out a steak. There are steaks that are better for grilling and some steaks are better to slow cook. Generally, if the steak has "chuck" or "round" in the name then it is better to marinate and slow cook. If the steak has "rib" or "loin" in the name it will be a lot more tender and better for grilling. Ask your butcher which types of steaks are best for the way you want to cook your steak.

The thicker the better. Steaks that are cut too thin are easy to over cook. Over cook a steak and you could end up with a dry, tough piece of "leather". It is easy to tell how thick steaks are at an old-fashion butcher shop. In fact, most butchers will cut thicker steaks for customers who request them. Be careful when buying steaks in packs. It can be hard to see the thickness of all the steaks.

It is important to look for steaks with the most fat marbling and streaking. Steaks with the most fat marbling are generally more flavorful and tender. The most marbled cut is the rib-eye. It is cut from the same piece of meat as the prime rib.

Don't cut the fat off! A lot of my customers want all the fat cut off the sides of their steaks. I don't recommend this at all! I tell my customers to leave the fat on while they cook their steaks. Fat helps keep the steak juicy and enhances the steak's flavor. You can cut all the fat off you want once the steak is cooked.

Knowing what to look for in a steak is as important as cooking a steak. Still not sure what to look for in a steak? Ask your neighborhood butcher. They always like to help ensure you get the best steak for your special occasion.

Creating Thai Food to Your Taste


The art of Thai cooking has been developed and refined over many centuries. This art has placed emphasis on the harmonious blending of various ingredients, particularly as the individual ingredients can vary by freshness and so forth. Without harmony the taste and the dish fall short.

The art of Thai cooking not only emphasizes harmony of taste, but also places value on the use of color and texture in a dish.

Over the centuries, most Thai dishes have drawn from the realm of herbs, roots, plants, spices and seeds to perfect the flavor, texture and presentation of a dish. The five elements of taste in Thai food are: sweet, salty, sour, spicy and bitter. There are no set ground rules for characteristics of Thai food, due largely to variables such as the region, the chef, or the occasion. The brand or processing of ingredients is also sometimes a factor.

When cooking Thai dishes, one may follow a recipe, but use it as a guideline when it comes to taste. Taste varies for each individual, sometimes in response to the above variables such as ingredient quality or occasion, and thus the tastes of the recipe author may or may not reflect one's own taste.

The sweetness of a dish not only comes from the vegetable or meat, but also from the processed sugar. There are many types and brands of sugar which certainly do not provide the same sweetness. In many Thai desserts, coconut palm sugar is required. However, some recipes may suggest palm sugar as a viable substitute. Both coconut palm sugar and palm sugar come from natural sources and are interchangeable; however, they differ from each other in taste and aroma.

In Thai cooking, fish sauce is one of the most important seasoning components, and there are a wide variety of brands to choose from. One brand may be saltier than others. Adding fish sauce little by little is always a good practice. Adding lime juice to crank up the sourness is a common practice in Thai cooking. However, there are so many types of limes, such as Key Lime, Limequat, Mandarin Lime or Sweet Lime. Each lime type has some sour flavor, but some also have a flavor of sweetness in them like Limequat and Sweet Lime.

Thais love spiciness and it has even become a trademark for Thai food. There are many types of Thai chili, and in practice, use varies by dish. The two famous chili types are Prig Kee Noo (spicy) and Prig Chee Fah (not very spicy). Within the Prig Kee Noo family, there are also different types with different degrees of spiciness. In Thailand, for instance, when Thais order Som Tum (Papaya Salad), the waitress or seller will ask "how many chilies do you want?" For some, just one Prig Kee Noo can burn the mouth. Curry pastes, another example, have different degrees of spiciness with each brand.

The flavor of bitterness usually comes from vegetables, herbs, plant or spices. Bitter Melon is a well-known vegetable for its bitterness. However, it is a very common vegetable in Thailand because of its nutritious content, especially antioxidants. Proper cooking, built on adding the right amount of sauces and ingredients can definitely remove most of the bitter flavor if not all.

Also consider coconut milk, which is used widely enough that it contributes significantly to coconut being considered a kind of Thai staple food item. Canned coconut milk and fresh pressed coconut milk can make a difference in the outcome of the dish since many Thai dishes use either thick (first pressed milk) and/or thin (second or later pressed milk). Canned coconut milk is usually thicker than fresh first pressed coconut milk. Today, coconut milk powder is available in the market for making coconut milk. With coconut powder, one can make thick and thin coconut milk by simply adjusting the amount of water. Coconut milk is one other example among many of a variable ingredient which helps set the stage for harmonizing dishes.

Since herbs, roots, plants and seeds have played important roles in Thai cooking, proper cooking is critical. This is because improper cooking can destroy the nutritional value, flavor or texture of ingredients. It is also very important that dishes must be a harmony of tastes within individual dishes and the entire meal.

Following a recipe is a good idea, but when it comes to taste follow your own preference. Know your ingredients and start adding flavor items in small amounts. Most Thai dishes can be fixed to some extent. If it is too sweet, adding a little bit of fish sauce will fix the problem and vice versa. If it is too sour, add a little bit of water; sugar or fish sauce will help. The harmony of tastes is a key to Thai dishes. However, some may disagree with a philosophy of harmonious flavor because some may like to have some flavors fighting in one's mouth. It is after all very much about one's preferences and taste. While the above highlights some elements in the art of Thai cooking, there are also important contributions made to Thai cooking by a variety of creative approaches. Thai cooking is a rich and living art that can lead to many new adventures.

Weight Loss Diets - Tips For Low Carb Cooking


Interested in trying your hand at the ever-popular low carb diets? Want to get started but aren't sure if this is really what you want to do? You can always try making some low carb dishes for a couple of weeks to see if it's a diet you think you can stick to.

On a low-carb diet, you eat fewer carbohydrates in your diet. If you're borderline diabetic (or full-fledged diabetic), then a low-carb diet can help you keep your blood sugar levels stabilized, and it also helps you lose weight in the process.

Breakfast is the most important meal of the day. People love to eat sugary breakfast treats,but when eating fewer carbs, other alternatives must be explored. Carbs turn into sugar, sugar burns quickly and then we are hungry again and have to eat more food

Low carb breakfast options are limitless. Several companies make low carb breakfast alternatives and you can even eat eggs. There are many recipes for muffins and other foods that are low in carbs and appropriate for breakfast.

Potatoes are not a good choice for those on low carb diets. You may think it's an odd choice but trying mashed cauliflower has been a hit for many people on this diet. You can prepare the cauliflower much in the same way you would traditional mashed potatoes. So you don't have to give up those comfort foods entirely

If you're a dessert lover, there's no need to give up desserts on a low-carb diet. There's a low-carb recipe for almost any dessert you can think of - including strawberry shortcake, cheesecake, brownies, Bundt cakes and even pies!

Brown rice is a great source of nutrition; you get way fewer carbs by eating it over white rice. Brown rice is a more health conscious choice

Dining out can prove to be difficult unless you know the difference between high and low carbs. Many restaurants have low carb menu choices available now, but in the off chance they don't, you should stick with foods you know to be low carb.

Low-carb diets are a safe way to lose weight, but you have to remember not to overdo it. You will still need to have some carbohydrates in your diet - low carb is very different from no carb. By trying to cut out all carbs, you'll only succeed in putting yourself in an unhealthy state.

Kids Cooking - It's Vegetable Time!


When springs comes, lots of kids like to start a garden. They rake up their patch of soil and decide which plants to grow. They think it's fun to poke holes in the ground, throw the seeds down the holes, and then cover them up. Kids are even good about watering their little seedlings. The best part, though, is picking the vegetables when they're ripe. They get to pull carrots out of the ground, dig deep for hidden potato treasure, and pluck the little cherry tomatoes off the vines.

But then what? Are they shocked because you actually want them to eat what they've grown? Here are a few ideas to get the kids cooking their veggies and eating them too.

Pizza
Let kids use their imagination when it comes to topping their pizzas. Start with a crust made from an easy recipe or a store-bought one. Next pour on the sauce; from scratch or bottled. It can be pizza sauce, barbeque sauce, alfredo sauce, or pesto sauce. They can use any type of cheese they want too. Let them pick out what they want to use, they may surprise you by branching out a little.

Here are some ingredients straight from the garden:
oregano, basil, rosemary, cilantro, garlic, green onions, asparagus tips, cooked potato hunks, red onion, broccoli tips, green and red peppers, spinach, yellow onions, and cherry tomatoes.

They can also add:
cooked chicken, cooked hamburger, pepperoni, sausage, and ham.

Pasta
Cold noodles make a great base for many different vegetables. Plus, pasta makes for some great experimentation. Try types of noodles that you don't usually buy - colored noodles, corkscrew, big shells, funny shapes. Cook the pasta up ahead of time and let it cool. Next, they'll want to make it "slippery" by adding a salad dressing. Zesty Italian and Ranch are two favorites.

Now it's time to add some veggies. They can use anything they like and anything that hopefully kind of goes together.

Possible pasta additions from the garden:
mushrooms, green onions, sweet onions, cherry tomatoes, roma tomatoes, leeks, broccoli, peas, pea pods, asparagus, garlic, cauliflower, green beans, zucchini, spinach, egg plant, chilies, and herbs.

Cheese chunks, walnut pieces, slivered almonds, and dried cranberries can make the pasta dish extra special.

If your kids don't want cold noodles, then make it hot pasta with any of the sauces you would use on the above pizza. You'll want to blanch the vegetables before you add them to the heated pasta.

Other ideas
There is something intriguing about creating a soup from scratch, so let the kids create their own by adding all kinds of different veggies. They can also use the vegetables they grew to add to hot rice or a green salad.

Since kids are more likely to eat food they've proudly grown and fixed themselves, they might be willing to eat vegetables they've turned their noses up to previously. It's worth a try and gets your kids cooking in the kitchen.

How to Make Candied Edible Flowers


Here's a list of things you need to make these beautiful Sugared Edible Flowers. However, don't worry if you don't have everything; you can use what you find around your home. This is a great project to involve your kids too! A nice way to inform them about flowers and their edible varieties.

Tools & Materials

-Edible flowers (washed & free of pesticides)
-Scissors
-Pasteurized liquid egg whites
-Tweezers
-Small paintbrush
-Superfine sugar
-Baking tray
-Waxed Paper

Directions

1. Cut the stem of the flower.
2. Dilute the pasteurized liquid egg whites with some water(about 1-2 tbsp). Holding a flower with tweezers, brush the egg-white mixture on all surfaces with a small paintbrush.
3. Sprinkle the superfine sugar over entire flower. Place on a tray covered with waxed paper, and allow to dry. Repeat for all flowers.
4. Allow the flowers to stand in a warm, dry place until crisp, about 2 to 4 days, turning them around (especially the larger flowers) regularly so that moisture does not collect beneath them.
5. Once dry, store them in an air-tight glass jar. These Candied Flowers will keep for at least 1 month in a dry place.

Here is a list of Edible Flowers to get you going. Take it up as a weekend project and you'll be surprised how easy yet fulfilling this is. It's a great project to do with kids too!

You can use these beautiful and sweet candied flowers to garnish your food, or even add them as a topping to your desserts or fruit punches. The best use is to decorate cakes. Just add these flowers after the cake has been frosted, sticking them onto the cake with some sugar syrup so that they stay in place!

How to Cook Long Grain Rice

Rice is a food staple that has been around for ages. Even in today's times, rice is consumed in extremely large quantities around the globe, (not just in Asia)! Lots of people like to eat rice, but find it difficult to cook the perfect plate of rice. In this article I will explore some tips and techniques that will tell you how to cook long grain rice.

First of all, since most of the long grain rice you buy today is clean, rinsing is not a must. Rinsing the rice before cooking though, will wash away the starch, thus making the rice less sticky. Soaking the rice is an option, but again, this is not a must. If you do soak the rice, make sure you drain it well. Otherwise, you'll use more water than you intended.

You should cook it in a pot that's big enough to be able to keep the steam in. There should be enough space between the rice and the lid for the trapped steam. In addition, the lid should be tight fitting. It's good to know that brown rice needs more time to cook that white rice. Also, older rice absorbs more water than new rice.

There are two ways on how to cook long grain rice. You can put in the rice, put more than enough water and when it's finished cooking, just pour out the excess water. The way that I prefer cooking it though, is through absorption. Cook the long grain rice with a measured amount of water. When the rice is finished cooking, all the water will have been absorbed. Trapped steam from inside the pot, will finish the cooking.

Generally, the rule is approximately 2 cups of water to 1 cup of rice. You may want to experiment a little with the exact amount of water. It basically depends on the type of rice and the way you like it! More water gives you softer, stickier rice. Less water gives you more separate, harder rice. Don't be afraid to experiment when you are learning how to cook long grain rice.

You can add a little salt go give it a little flavor. Let the rice simmer for approximately 12-15 minutes on a tiny flame. When it has finished cooking let it rest for 5-20 minutes. Don't forget this step. It is one of the most important steps to get well-cooked, fluffy rice. Now that you know how to cook long grain rice, try it out in the kitchen. Good Luck and Good Appetite!

How to Make Mozzarella Cheese


There a few sites out there that tell you how to make mozzarella cheese, but I wanted to put together an article that gives a little history and explains the simple way of how to make mozzarella cheese. Mozzarella is one of several kinds of "plastic-curd" cheeses, originating in Italy. Mozzarella is one of the most versatile cheeses to make at home. It tastes wonderful freshly made, freezes well, can be used like an aged cheese in cooking, and melting readily when heated. Mozzarella cheese is ready the same day its made. The aged cheeses like Cheddar, Gouda and Colby are ready to eat in just a few weeks. Making Mozzarella has no smoke and mirrors. Mozzarella making, on the small home scale, is much more art than science. All you need to begin making mozzarella at home is a stainless steel pot, a dairy thermometer, measuring spoons and some cheesecloth. The basic ingredients for making cheese are milk, starter culture and or natural acids, and rennet. Traditional mozzarella is made from water buffalo not North American buffalo or bison as many mistakenly think. Buffalo milk, and its flavor are highly prized. However, any type of milk can be used to make mozzarella cheese. Homemade fresh mozzarella cheese has fabulous flavor.

Quick Recipe explaining how to make Mozzarella Cheese and enjoy the same day.

You will need:

--A 6 to 8 quart stainless steel pot. Aluminum or cast iron will not work.

--A stainless steel or strong plastic slotted spoon.

--A two quart microwave safe mixing bowl

--measuring spoons

--A thermometer which will clearly read between 80 - 120 degrees F.

Step 1 (How to make Mozzarella Cheese)

Do not prepare any other food while you are making mozzarella cheese. Put all food products away. Move all sponges, and dirty towels away from your work surface, clean your sink and stove with soap and water. Finally use an antibacterial cleaner to wipe down all surfaces.

Step 2 (How to make Mozzarella Cheese)

Crush 1/4 tablet of rennet and dissolve in 1/4 cup of cool water and set aside to use later. Heat the milk to 90F and add 1.5-2 tsp. of citric acid. This will bring the milk to the proper acidity to mold well later. As you approach 90F you will notice your milk beginning to curdle due to acidity and temperature. When at 90F add the rennet (which you prepared in previous step) to the milk and stir in a top to bottom motion for 30-60 seconds.

Step 3 (How to make Mozzarella Cheese)

Now turn the heat off (it may continue to rise as high as 105* or so) Let the milk remain still for the next 3-5 minutes during which it will form a curd. A longer set will result in a firmer curd. Cut the curds into a 1" checkerboard pattern and then scoop with a slotted spoon into a heat proof bowl for the microwave. (If the curd is too soft at this point let sit for another minute or so) Now press this curd gently with your hand, pouring off as much whey as possible. Reserve this whey to use in cooking or making ricotta cheese.

Step 4 (How to make Mozzarella Cheese)

Microwave the curd on HI for 1 minute. You will notice more whey has run out of the curd. Drain off all whey. Quickly work the cheese with a spoon or your hands until it is cool enough to touch (rubber gloves will help since the cheese is almost too hot to touch at this point) Microwave 2 more times for 35 seconds each and repeat the kneading. Drain all of the whey off as you go through these steps.

Step 5 (How to make Mozzarella Cheese)

Knead quickly now as you would bread dough until it is smooth and shiny. Add salt near the finish. At this point the cheese should be soft and pliable enough to stretch like taffy. It is ready to eat when it cools. Form it into a ball and drop into ice water to cool and refrigerate. When cold you can wrap in plastic wrap and it will last for several days but is best when eaten fresh.

That is how to make mozzarella cheese. A tasty way to enjoy this is simply layer fresh mozzarella and fresh tomatoes, then top with fresh basil leaves, coarse sea salt, freshly ground black pepper and a drizzle of cold-pressed extra virgin olive oil. Anyone who tries will be wowed!

How to Bake Chicken and Its Health Benefits


Some people can imagine chicken delicious only when it's fried. Granted one has to admit that it really does indeed taste great when cooked like that, but is it healthy? And if it is not healthy, is there another way to prepare chicken quick and easy which not only will taste great but also provide a much healthier option for those on a diet or who simply wish to watch what they and their families eat.

Well, in fact there is, there's a much better alternative of cooking it fried and indeed just as delicious, if not more - the simple question then is: Why not bake chicken?

It is not hard as it sounds either. By following simple instructions you are on your way to a healthy and great tasting meal.

To bake chicken we need either a whole chicken or 6 chicken breast pieces. Wash the dressed chicken thoroughly and coat with olive oil. Sprinkle enough salt and pepper to taste. If we want, we may put some marinade mix, like a concoction of rosemary herbs, thyme or oregano, dried or fresh. For simple marinade, try soy sauce and lemon. As we're doing these, pre-heat the oven to 350 degrees.

Now we're ready to bake chicken.

-Put the chicken on the baking dish. Then place it in the oven and make sure it is uncovered.

-Bake chicken for an hour and a half in 350 degrees till we see the chicken skin turn into a luscious and juicy golden brown.

-Place inside a meaty part of the chicken a meat thermometer to check if the meat temperature has reached 170 degrees. If it has then we're ready to take it out of the oven. To bake chicken thighs we need the meat temperature to reach 180 degrees. These standard meat temperatures make sure we bake chicken well with all parts cooked. Half-cooked chicken, or any meat for that matter, can cause stomach upset or even food poisoning.

-Then we cut the fleshy part of the meat deep. This should reveal white meat inside instead of pink and clear lip-smacking juice, not reddish. To bake chicken correctly all these tests should be satisfied. If not, we bake the chicken some more. Then we're ready to serve tender and juicy baked chicken, in all its yummy goodness.

When we opt to bake chicken we come out with a healthy and tastier chicken than when we fry it. Deep frying may be a good idea. But baked chicken is still many times better. When re-heating left-overs through the oven chicken often comes out tasting better than if we re-fry left-over chicken.

When we bake chicken we can even opt to stuff it with potatoes, or garlic and onions. There are lesser chances of burning the meat or ruining the skin cover. Lots of times, we need breading to fry chicken-that's added cholesterol. If we merely bake chicken there is no need for any covering on the skin surface.

So opt to bake chicken more often. It will surely do well for our taste, health, and family.

How to BBQ Ribs


So, you want to know how to BBQ Ribs expertly? Well, first of all you should understand that professional chiefs use "smokers", the best ribs are not cooked on a BBQ, as the cooking is too fast and the meat is then tougher! It is possible, however, to cook them in a conventional oven; the only thing missing will be that nice smoky flavour, but that can be added by simply putting a small amount of liquid smoke into your sauce.

The secret to great ribs is that they need to be cooked at low temps for long periods of time. Professionals cook all their meats this way; at 225°F for 6 hours for ribs, 10 - 12 hours for pork butts and up to 18 hours for brisket. But, don't worry, I will show you how to do ribs in around 3-4 hours!

First to dispel a couple of myths about ribs:

"The secret to great ribs is to boil them first!" and "Boiling/steaming gets all the fat out", BOTH WRONG! Never, ever boil or steam your ribs! I don't care what your mother taught you or what a famous chef on Food TV did. Never do it! In essence, what happens is the water or steam goes in and the flavour of the meat (and some, but very little of the fat) comes out. If you doubt this, taste the water after you have boiled something in it. This is the whole concept behind making soup! All the flavour ends up in the water! So, just don't do it!

Preparation:

The night before you should choose your favourite rub (combination of spices) and apply it to the ribs. Then wrap them in plastic wrap and refrigerate overnight. A truly great rib can be tested using simply salt and pepper; this is called a "dry" rib (a "wet" rib has sauce on it)! I suggest everyone try their ribs "dry" first, and then start experimenting with various rubs and sauces to find their favourite.

Take the ribs out of the fridge about 1 hour prior to cooking.

Cooking Method:

Preheat your oven to 275 F. If you have more time, you can set the oven at 250 F, and it will take about 4 hours to do.

Place a cake pan of hot water on the lowest rack. You may need to add water to this near the end.

Place the ribs in the oven bone side down and don't ever turn them (this allows the fat to 'travel' through the meat leaving all the flavour behind)! Place them on a wire rack directly above the water pan to catch the dripping fat.

After 1 1/2 hours of cooking (not before!), splash or mop the ribs with a mixture of 3 parts apple juice and 1 part oil. Do this every 1/2 - 3/4 hour until done.

To test for doneness, watch for the meat to pull back from the ends of the bones or insert a toothpick between the bones and if it goes through easily they are done.

Finally, apply any sauces 20 minutes or less prior to eating. This will avoid the sugars burning and turning black, and believe me, there's loads of sugar in every BBQ sauce!

Like I said, this whole process will take around 3 - 4 hours depending what temp you cook at. It may take a little practice to get to your desired doneness but that's half the fun! That's it, that's how to BBQ ribs and without a BBQ too!

Top 10 Reasons to Love Your Food Processor

You should get a food processor if you don't already have one. In fact, go out and get one today! Out of every appliance in my kitchen, it is my absolute favorite, and I use it constantly. In fact, I never put it away. I have a small processor for fast shopping or veggies and herbs and a large 14-cup processor to make all sorts of wonderful concoctions. So again, if you don't have one of these marvels, you need to get one.

Here are my top ten favorite things to make using a food processor.

1. Peanut butter cookies, the easiest recipe in the world: 1 cup sugar, 1 egg, 1 cup peanut butter, and a teaspoon of vanilla if desired. Toss them into your processor; give it a whirl for a few seconds until well mixed. Scoop out a tablespoon of dough and scrap it on the side of the bowl to even the spoon, drop onto a cookie sheet and smash it down with a fork to make the cross hatch design. Bake at 350 degrees for 7 to 9 minutes and you have fabulous, gluten free peanut butter cookies.

2. Specialty butters are definitely a favorite of mine. In fact, I get ideas from many restaurants, constantly seeking new flavors to spread across bread. Armed with my food processor, making specialty butter has never been so easy. My favorite is basil-garlic butter. By processing a stick of butter with a couple cloves of garlic, I can then add some crushed basil leaves and let it sit in the fridge for a week or so in an air-tight container. Then, it's French bread and wine for dinner. Sometimes I even use it on grilled cheese with mozzarella, sliced tomatoes, and bacon. So delicious!

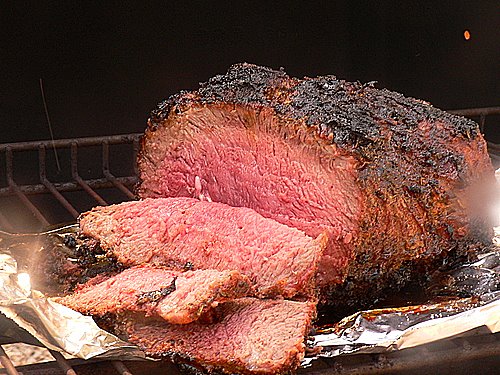
3. Make steak sandwiches by chilling, but not freezing, leftover steak in the freezer until firm but not frozen. Slice with your processor and then add to a skillet in which you have been sautéing bell peppers and onions. Put it all on a sandwich bun, top with jack cheese, and enjoy. I know, who has leftover steak? Plan for this and throw an extra steak or two on the grill next time.

4. One of my favorite uses for a food processor is making soup when I've had a hard day. Some chopped onion, garlic, milk, a bit of flour, chicken broth, broccoli, cheese, and pepper can be easily put together to make an excellent meal. After sautéing the onions and garlic, add all ingredients except milk and flour and cheese, cooking over medium heat for 10 minutes. Afterward, combine with milk and flour and cook an additional 5 minutes, then let cool while adding cheese until it melts. Place in a food processor, and you have smooth, creamy broccoli-cheese soup that can relieve any stress-filled day.

5. Want to make a great hollandaise sauce in a short amount of time? Take ¾ cup of butter and melt it. Then take three egg yolks, 1 tablespoon lemon juice, 1 tablespoon water, and a teaspoon of Dijon mustard and mix on high in your food processor, slowing adding the melted butter. Add a bit more lemon juice, some cayenne, and some salt to taste, blending well, and store the mixture for 30 minutes.

6. Puree unsalted and lightly seasoned foods for your baby and save on the cost of canned or bottled baby food. On the flip side of life, you can puree foods for the elderly who have denture issues.

7. I make dips and spreads with my processor; my favorite is a pureed cucumber and cream cheese dip. Sorry, secret family recipe.

8. I am a huge fan of chocolate, and my food processor allows me to take melted chocolate chips, some tofu, salt, 3 egg whites, half a cup of sugar, and a quarter cup of water and turn it into a light, chocolaty masterpiece. My chocolate mousse is a favorite amongst all of my friends, and can be topped with either grated chocolate, whipped topping, or both!

9. To chop nuts, I use the shredding disc which makes the pieces more uniform in size and doesn't make the texture too fine or risk turning the nuts to butter.

10. My 14 cup processor will hold an 18.5 ounce cake mix. I can have the cake ready to bake in less time than it takes me to haul my big mixer out and find the correct beater.

There it is; my list of top 10 favorites. Keep your processor accessible, and you'll be amazed at how quickly you come up with your own top 10 list.

Classic Thanksgiving Recipes


It's that time of year again. Time to start looking for some great Thanksgiving dinner recipes. In my family I am in charge of this dinner and I want to satisfy myself and my family. I do this by trying new recipes. This way I'm challenged when time comes to cook, and my family gets their old tried and true Thanksgiving favorites and gets to try some new dishes, some of which may become tried and true too!

It's easy to do an internet search for Thanksgiving menu ideas. If you do this you'll end up with millions of search results, but how do you know you can trust a recipe? There are hundreds of thousands of food blogs out there and frankly, not all the recipes are good. The way you know you can trust a recipe is it's source. It doesn't necessarily have to come from a "food site" but, if it's referenced it should be from a cook book, or other trusted source, such as a well known chef, and that source should be named.

So what are some tasty and easy Thanksgiving dinner ideas? How about a new twist on stuffing? Try a stuffing with Sausage, Apple and Sage, or maybe even a homemade Chestnut Stuffing. How about adding a cranberry side dish such as Fresh Cranberry Orange Compote or making a tangy Cranberry Apple Chutney? These Thanksgiving side dish recipes are quick and easy.

Make sure that you use the turkey giblets to make a homemade turkey broth. A homemade turkey broth is the only way you can assure you're going to get the best flavor out of your stuffing. A well seasoned turkey broth truly makes all the difference in the outcome of your dishes. I wouldn't consider making Madeira Gravy without my homemade stock.

If you've never cooked a turkey, or if you simply want a reminder it's also easy to find tips on cooking a turkey online. Year after year I make notes about my dinner. I may have cooked too much of one thing and not enough of another. My family may not have liked a new dish or may have. Making notes after cooking my Thanksgiving dinner is a way I remember from one year to the next.

One of the tricks to successful Thanksgiving dinner is not just the recipes, it's knowing how to time the dishes. Every year I make a time-line for cooking. This way I'm assured that all my stuffing, vegetables and side-dishes come out perfectly cooked, and all at the same time. This way when we sit down to eat everything is hot and ready. Having a time-line also takes stress off of me. All I have to do is follow my list and I know that everything will be under control.

Don't forget to ask family members to bring a dish to your dinner. Share your Thanksgiving recipes with them. Maybe you can ask a sister-in-law to make a side-dish of Pearl Onions au Gratin and ask your mother to make the Bourbon Cranberry Sauce and have your sister make the Campbell's Green Bean Casserole. Perhaps you can assign each of them a dessert item like a Strawberry Trifle or Red Velvet Cake.

We love hosting our family, I enjoy trying new recipes and they enjoy tasting new dishes. It's a win-win situation for us!

Cooking Tips For Gas Grills - Now You're Cooking With Gas


Anyone can cook food on a grill. But, very few can do it correctly or well. If you follow these cooking tips for gas grills, you will soon be known as the local grillmaster of the neighborhood.

1) Safety first, check for leaks - Most grills use highly flammable gas to cook, it's important to make sure that there are no leaks along the hose running from the tank to the burners. The way to do this is to take a small cup filled with water and a bit of dish detergent. Rub the solution along the joints of all the connections along the hose. Turn the gas on and look along hose. The gas will make the detergent/water solution bubble up if there are any leaks.

2) Let the grill heat up - It's important to give a gas grill a few minutes to heat up. Turn the grill to high on all burners and letting it sit for 5 or 6 minutes. Not only will this burn off anything stuck to the grill, but it will also allow you to get the grill temperature to the correct setting before you start cooking.

3) Wipe the grill with a bit of oil - This is one of the cooking tips for gas grills that everyone seems to miss. Before cooking, always wipe the grilling area will a small amount of oil. This will keep the food from sticking down. Using tongs, take a small piece of paper towel and dip it in oil. Rub this along the grill. You don't need a lot, just enough to keep the food from sticking down.

4) Keep the cover closed - It's hard not to peek at whats cooking, especially when it starts to smell. But, it's very important to fight this urge. Everytime you open the grill cover you are releasing the hot air that's helping to cook the food. This will extend the time it takes to finish cooking. The longer the food is on the grill, the more likely it is to burn on the outside.

5) Use tongs for meat, not forks - While this one doesn't just fall under cooking tips for gas grills, it's still a very important and deserves to be mentioned here. Using a fork with meat is going to poke holes. This is going to allow the juices building up inside the meat to drain from it. Not only will this make the meat dry, you are also in danger of causing grease fires as the juices fall into the flames.

6) Let it cool down before cleaning - This is the last of my cooking tips for gas grills. It's far easier, and safer, to let the grill cool down before trying to clean off the mess. It's recommended to leave it for a few hours or overnight and to clean it once it's completely cool.

Steaks - The Different Cuts You Can Use on Your Outdoor Grill


What cuts of steak are the most tender?

When a steer (cow) is taken to the meat processing center, the meat is cut from eight quadrants of the steer. The quadrants are called the Chuck, Rib, Loin, Sirloin, Round, Shank, Brisket, Plate & Flank. The most tender steaks come from the Loin part of the animal. The Loin is where the Porterhouse, T-Bone (my favorite), Top Loin & Tenderloin are cut. The most popular way to cook these are on a gas grill or charcoal grill. When grilling the steaks I recommend cooking the steaks on low heat, which keeps the steak from drying out. On my gas grill I like to only turn the steak once, this helps to keep the juices of the steak in the meat. The more times you turn the steak over the more juices you loose to the grease pan at the bottom of the grill. Never us a fork to turn the steaks, use a pair of tongs.

Other cuts of steaks:

Chuck - Chuck Eye, Shoulder Top Blade, Flat Iron, Ranch Steak & Shoulder Petite Tender

Rib - Rib Steak & Ribeye

Sirloin - Tri-Tip Steak & Top Sirloin

Round - Top Round & Sirloin Tip Center

I happen to live in a part of the country that can be considered cattle country. My Dad happens to raise cattle, so I have access to the many cuts of meat. Every year my Dad will take a steer to the local meat processor and will have it cut into many cuts of beef which include the many steaks listed plus ground beef etc. If you have the opportunity to do this I would recommend it. The flavor of these steaks are hard to match by any restaurant. In fact when we go out to eat, I usually don't order steak, because I know it cannot match what I have at home in the freezer.

You can cook steaks on your gas grill, charcoal grill or with the broiler in your range. Cooking the steaks is very important, this will determine the flavor and texture. Using a gas grill is the quickest, but some people love the flavor of charcoal. You can also use natural wood such as Mesquite to add flavor when you barbecue.